# Beginners Guide to building in GCP with Terraform
# Goal
This article will set out what you need in order to be able to standup an automated build of a VM
(`Google Cloud`) a web server (`Apache`) and `Ansible`.
## What will we cover
- Deployment of a Google Compute VM instance using Terraform
- Use of a Compute Instance `startup` script or `user-data`
- Rendering a Terraform template
## Dependencies
You have created a GCP account (or trial account). You will receive $300 of credits and also 750 hours per month will be free if you select the `e2-micro` instance. More information can be found in the tutorial below including the configuration of your `gcp-creds.json` file
%[https://www.youtube.com/watch?v=gb0bytUGDnQ]
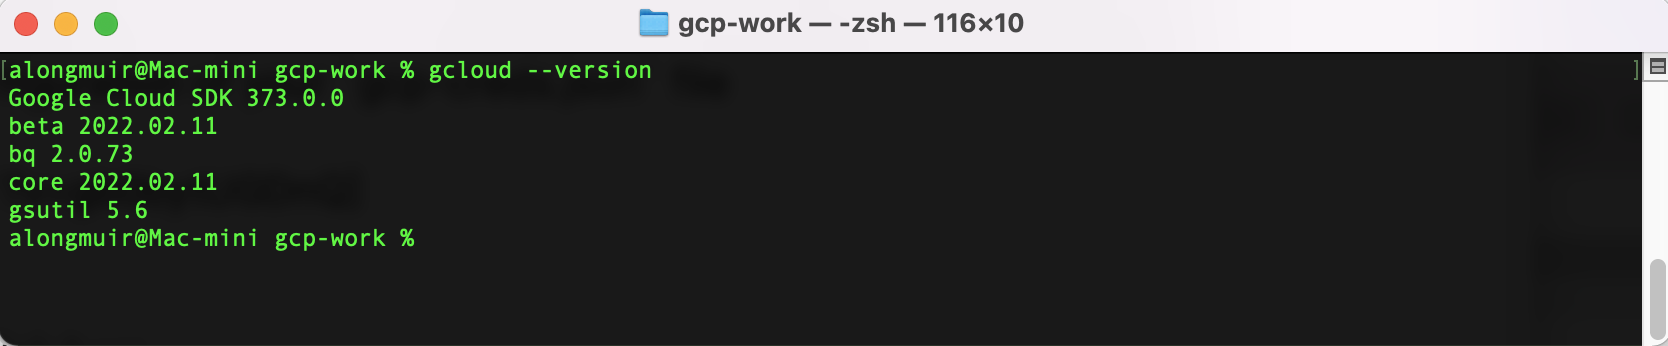
The Google Cloud SDK is installed link here [https://cloud.google.com/sdk/docs/install](Link)
You can validate this with `gcloud --version`
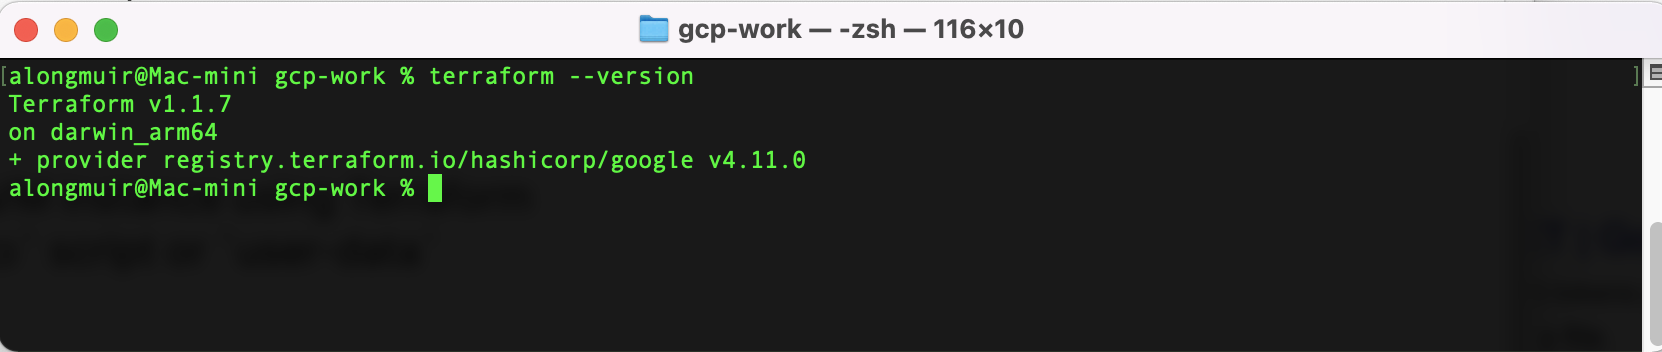
Terraform is installed link here [https://www.terraform.io/downloads]
You can validate this with `terraform --version`
Our Terraform code will build all the firewall rules, network, API dependencies and resources along with ssh key access using your own public key `id_rsa.pub`
# `Lets Begin`
### Creating a Google Compute Engine VM
Create a local directory for your terraform project

Define the Google provider in your terraform code along with `client.json` credentials.
Create all the code in your terraform project directory
`vi main.tf`
``` bash
# Main terraform code block
# Author: Andrew Longmuir
# Date: March 2022
# Description: Automate build of CE, Firewall rules & tags. Install web server, ansible & docker
# Platform: GCP
# Version: 1.0
#########################################################################
provider "google" {
credentials = file("my-gcp-creds.json") // export GCLOUD_KEYFILE_JSON
project = "dev-work-342110" // export GCLOUD_PROJECT
region = "us-west1" // export GCLOUD_REGION
zone = "us-west1-c" // export GCLOUD_ZONE
}
```
`**NOTE**` this can also be set as variables see addendum for additional improvements.
We are now going to create the resources in our code:
`Firewall rules`
``` python
resource "google_compute_firewall" "web" {
name = "web-access"
network = "default"
source_ranges = ["0.0.0.0/0"]
allow {
protocol = "tcp"
ports = ["80", "443", "22"]
}
target_tags = ["http-server", "https-server", "allow-ssh"]
priority = 1000
}
```
`Enable APIs`
``` python
resource "google_project_service" "api" {
for_each = toset([
"cloudresourcemanager.googleapis.com",
"compute.googleapis.com"
])
disable_on_destroy = false
service = each.value
}
```
`Configure Compute Engine instance, network and bootstrapping`
``` python
resource "google_compute_instance" "gcp-dev-build" {
name = "gcp-server-dev"
machine_type = "e2-micro"
boot_disk {
initialize_params {
image = "ubuntu-1804-bionic-v20220131"
}
}
network_interface {
network = "default" // This enables Private IP Address
access_config {} // This enables Public IP Address
}
```
`Apply the firewall rule to allow external IPs to access this instance`
``` python
tags = ["http-server", "https-server", "gcp-dev-build"]
```
To use the latest `debian` disk image we can use the data source and any type of instance can be selected:
``` python
data "google_compute_image" "debian" {
family = "ubuntu-1804-lts"
project = "gce-uefi-images"
}
```
You can play around with different build installations
`Invoke our build script`
``` python
metadata_startup_script = file("/Users/alongmuir/coding/terraform-project/gcp-user-data.sh")
depends_on = [google_project_service.api, google_compute_firewall.web]
}
```
The contents of the `gcp-user-data.sh` are as follows.
``` bash
#!/bin/bash
# Test Basic Web Page. Install updates, apache and enable/start
sudo apt-get update
sudo apt-get install -y apache2
sudo systemctl start apache2
sudo systemctl enable apache2
sudo echo "Instance deployed by Terraform in GCP instance build time
`date`" | sudo tee /var/www/html/index.html
# Install pip and ansible
sudo curl https://bootstrap.pypa.io/get-pip.py -o get-pip.py
sudo python3 get-pip.py --user
sudo python3 -m pip install --user ansible
sudo python3 get-pip.py
sudo python3 -m pip install ansible
# Upgrade to latest pip
sudo python3 -m pip install --upgrade pip
sudo apt install ansible -y
```
`Pass public RSA key via terraform to VM instance`
``` bash
# Pass public RSA key via terraform to VM instance
resource "google_compute_project_metadata" "my_ssh_key" {
metadata = {
ssh-keys = <
EOF
}
}
```
This will hardcode they key into your code there are ways you can obfuscate this. Some additional research for you 😉 but worth noting not to push your code to any public `GIT` repos.
`Lets display our outputs`
``` python
data "google_project" "project" {
}
output "instance_ip" {
value = join(" ", google_compute_instance.gcp-dev-build.*.network_interface.0.access_config.0.nat_ip)
description = "The public IP address of the newly created instance"
}
output "project_name" {
value = data.google_project.project.name
}
```
# `Lets Initialise our Terraform Project`
To do this run `terraform init` see output below.
``` bash
alongmuir@Mac-mini terraform-project % terraform init
Initializing the backend...
Initializing provider plugins...
- Finding latest version of hashicorp/google...
- Installing hashicorp/google v4.13.0...
- Installed hashicorp/google v4.13.0 (signed by HashiCorp)
Terraform has created a lock file .terraform.lock.hcl to record the provider
selections it made above. Include this file in your version control repository
so that Terraform can guarantee to make the same selections by default when
you run "terraform init" in the future.
Terraform has been successfully initialized!
You may now begin working with Terraform. Try running "terraform plan" to see
any changes that are required for your infrastructure. All Terraform commands
should now work.
If you ever set or change modules or backend configuration for Terraform,
rerun this command to reinitialize your working directory. If you forget, other
commands will detect it and remind you to do so if necessary.
alongmuir@Mac-mini terraform-project %
```
This will download your provider resources defined earlier. You can view this under `.terraform` folder in your project directory.
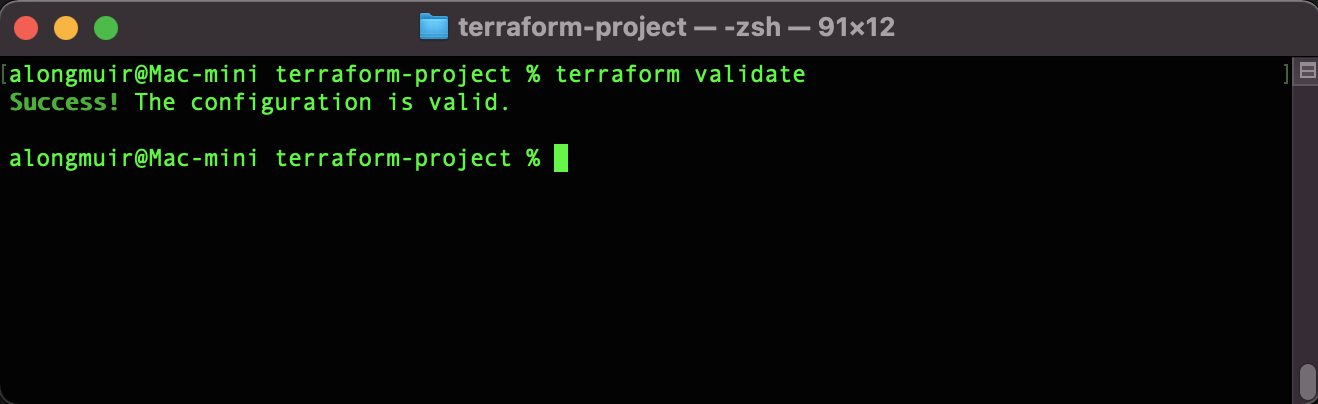
Now lets validate the syntax of our code with `terraform validate`
Running `terraform plan` will inform you of what will be created or changed when running your code. Terraform remembers this by its state file. I'll do an additional article on how to configure this best practice.
OK ... lets build our resource in GCP. To do this execute `terraform apply` and answer `yes`
If you run `terraform apply -auto-approve` this will omit the need to validate with a prompt.
``` bash
Plan: 5 to add, 0 to change, 0 to destroy.
Changes to Outputs:
+ instance_ip = (known after apply)
+ project_name = "Dev-Work"
google_project_service.api["compute.googleapis.com"]: Creating...
google_project_service.api["cloudresourcemanager.googleapis.com"]: Creating...
google_compute_project_metadata.my_ssh_key: Creating...
google_compute_firewall.web: Creating...
google_project_service.api["compute.googleapis.com"]: Creation complete after 4s [id=dev-work-342110/compute.googleapis.com]
google_project_service.api["cloudresourcemanager.googleapis.com"]: Creation complete after 4s [id=dev-work-342110/cloudresourcemanager.googleapis.com]
google_compute_project_metadata.my_ssh_key: Still creating... [10s elapsed]
google_compute_firewall.web: Still creating... [10s elapsed]
google_compute_firewall.web: Creation complete after 12s [id=projects/dev-work-342110/global/firewalls/web-access]
google_compute_instance.gcp-dev-build: Creating...
google_compute_project_metadata.my_ssh_key: Creation complete after 12s [id=dev-work-342110]
google_compute_instance.gcp-dev-build: Still creating... [10s elapsed]
google_compute_instance.gcp-dev-build: Creation complete after 13s [id=projects/dev-work-342110/zones/us-west1-c/instances/gcp-server-dev]
Apply complete! Resources: 5 added, 0 changed, 0 destroyed.
Outputs:
instance_ip = "34.83.92.251"
project_name = "Dev-Work"
alongmuir@Mac-mini terraform-project %
```
Now if you navigate to the [Google Console](https://console.cloud.google.com) and navigate to Compute Engine --> VM Instance, you will see an instance coming up. Once the instance is up successfully, browse the webserver_ip. In this case, go to http://34.83.92.251

`NOTE` You can see the terraform output showing the public IP address
`Here we can see the web server is provisioned by code and build time`

To remove all resources that have been created just run `terraform destroy` you can also apply the same switch if you do not wish to be prompted
# Additional Improvements
Given the size and complexity of the terraform code it isn't worth the effort to break this down into modules and separate `.tf` files. However this is `good practice` so for extra practice attempt the following:
Remember Terraform is a declarative language so this will help in modularisation of your code.
- Create separate `.tf` module files
- Create custom variables
- Running `terraform fmt` will ensure your code is nicely formatted.
- Test the Ansible deployment by configuring a local `Inventory.txt` file and running the following command.
``` bash
ansible gcp_servers -m script -a "update_web_server.sh"
```
`TIP`
The contents of your `update_web_server.sh` file should be something like
``` bash
sudo echo "Instance Built Using Terraform in GCP
`date`" | sudo tee /var/www/html/index.html
```
### Thats all until next time 💥
## Good luck and Happy Coding 💻